

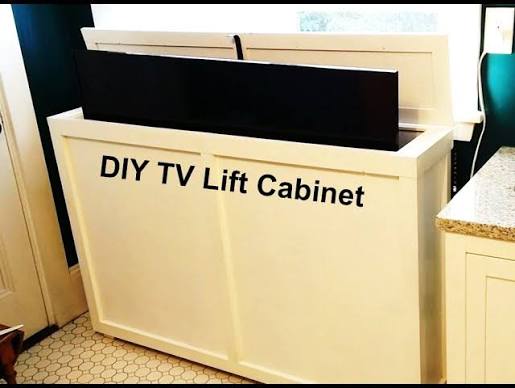
A complete tools, materials, and mechanism checklist for building your own TV lift cabinet plus the measurement and sequencing mistakes that trip up most DIYer
Building your own TV lift cabinet is a genuinely doable weekend-to-week project for anyone comfortable with intermediate woodworking, but it goes much more smoothly with a complete materials list in hand before you start, rather than discovering gaps mid-build.
Full tool list
- Table saw or circular saw with a straight-edge guide — for breaking down plywood sheets into panel dimensions
- Drill/driver with a full bit and driver set — for assembly, pilot holes, and hardware installation
- Router — for cable pass-through holes and any inset panel or edge detailing
- Jigsaw — specifically for cutting the top opening the TV lifts through, which needs a curved or precise cutout most other saws can't handle
- Clamps — more than you'll think you need; glue-ups and panel assembly go far more smoothly with adequate clamping capacity
- Level and tape measure — for both construction accuracy and confirming the final cabinet sits level (uneven footing can affect smooth lift operation)
- Sandpaper or orbital sander — for finish prep on all visible surfaces
Full materials list
- Plywood — ¾" for structural panels (sides, base, internal supports) and cabinet-grade plywood or veneer-faced panels for any visible surfaces
- Wood screws and cabinet-grade hardware — including hinges, drawer slides, and any pulls or handles
- Wood glue — for panel joints, in addition to mechanical fasteners
- Finish materials — veneer, paint, or stain matched to your existing furniture, plus a protective topcoat
The lift mechanism — the component most DIYers underestimate
- A pre-built linear actuator or scissor-lift kit, rated for your specific TV's weight with margin to spare this is the safety-critical component of the build, and it's strongly worth buying a purpose-built kit rather than attempting to fabricate a lift mechanism from scratch
- Mounting bracket matched to your TV's VESA pattern — check your TV's specific VESA measurement before ordering, since these vary by TV size and manufacturer
- Remote or wall-switch control unit, typically included with mechanism kits
- Power supply appropriate to the mechanism's voltage requirements — confirm this before purchasing, especially if you're sourcing the mechanism separately from the control unit
Sequencing: what to buy and measure first
The single most common DIY mistake is designing and cutting the cabinet before finalizing the lift mechanism choice. The mechanism's collapsed height and footprint should directly determine your cabinet's internal dimensions not the other way around. Buy or at minimum finalize your mechanism selection first, get its exact spec sheet, and build your cabinet plans around those numbers.
The measurement that gets missed most often
Confirm your cabinet's internal depth accommodates the mechanism's full collapsed height, plus your TV's mounted depth (TV thickness plus bracket standoff distance), with real clearance to spare — not an exact match. Cutting dimensions too tight leaves no margin for minor assembly variance and can result in a TV that doesn't fully retract or a lift that binds against the cabinet interior.
Budget planning
The lift mechanism kit is typically the single biggest line-item cost in the entire build often more than all the wood, hardware, and finish materials combined. Price and select the mechanism first, and build your overall project budget and cabinet scope around what's left, rather than budgeting the cabinet first and hoping a mechanism fits what remains.
A realistic time estimate
For an intermediate woodworker, expect a full weekend for cabinet construction and assembly, plus additional time for finish work (staining, painting, topcoat drying between coats) and mechanism installation and testing. Rushing the finish work or the mechanism testing phase is where most DIY builds run into trouble late in the project.